Some might say one pair of scissors is as good as the next, but oh no no, that is most definitely not the case. I have tons of scissors in my craft room, each with a specific purpose. Decorative edge scissors, pinking shears, non-stick scissors, etc. When it comes down to it though, my favorite pair would be my Fiskars Micro-Tip scissors. The small design and pointed tip allow me to cut small details and the grip design is much less stressful on my hands. And the pink is a plus lol.
Friday, May 30, 2014
Favorite Things Friday - Scissors
It's time for another editions Scrap It Girl's Favorite Things Friday. This week, the members of the design team are showcasing our favorite scissors.
So what is your favorite pair of scissors?
Monday, May 19, 2014
Keychains and Earrings
Ready for another fun project using Unique Laser Designs products? Today I have some super easy, super fun, and super cute key chains plus a set of earrings, all made using the same process. So lets get started on how these were made.
First, we gather our supplies. Wire cutters, beading pliers, head pins, jump rings, beads, wine cork, Unique Laser Designs butterfly (I pre-drilled two holes in it), eye screws, and your choice of inks and adhesives.
Start by taking a head pin and adding on several beads.
Next, using the wire cutters, cut the head pin, leaving approximately 3/4 inch above the last bead. Then, using the beading pliers, bend the top of the head pin to form a loop.
Repeat the process to make a second link of beads.
Using your choice of markers or inks, add color to your wooden embellishments. I chose a butterfly from the Unique Laser Designs collection.
Now to connect all the pieces together using jump rings.
Color the wine cork using a shimmer ink.
Add eye screws to each end of the cork. Because the cork is fairly soft, you will need to add a strong clear drying glue to the eye screws to make sure they do not come out of the cork.
Using another jump ring, attach the beaded link to the cork.
Attach the key ring to the second eye screw using a jump ring.
Lastly, I used a chalk pen to add details to the butterfly.
Using the same process, I created a second key ring using a gorgeous teal color and a heart wooden embellishment.
How cute would these be holding your car or house keys?
The same beading process can be applied for jewelry also. These earrings were made using stars which were painted silver, then sanded for an aged look, then added to a beaded link which was then attached to earring hooks.
Friday, May 9, 2014
Favorite Things Friday - Embossing Folders
It's that time again...time for Scrap It Girl's Favorite Things Friday! And the theme today - embossing folders. A super fun way to add lots of texture to your projects.
I pulled just a few of my favorite embossing folders from my stash...but I have to say my most reached for folder is the swiss dots. It's just such a classical design.
So what's your favorite embossing folder?
Monday, May 5, 2014
Ladybug Napkin Rings
Ready for another fun project using Unique Laser Designs wood embellishments? Well today I have a fun summery themed project perfect for that outdoor picnic - ladybug napkin rings! Ready to get started?
First I painted the napkin rings with two coats of white acrylic paint, letting them dry fully in between coats.
Next, I add a a bit of washi tape to add an easy pop of color.
For another pop of color, I used a red marker to color the ends of the napkin rings.
Using shimmer mists, I added lots of bright color to some flowers.
Now, on to the super cute ladybugs! I simply used a red and black marker to color the wood, then added some googly eyes.
Lastly, I simply layered the flowers, added the ladybugs on top, then adhered the flowers to the napkin rings.
These guys are absolutely adorable, and super quick to make too! How cute would your picnic table look with one of these at each place setting?
Thursday, May 1, 2014
Mother's Day Wall Hanging
It's the beginning of another month, which means it's time for a new challenge at Scrap It Girl. And this month it's all about Mom and her special day. So today I have a wonderful little project to celebrate Mother's Day.
I found these mini canvases at the craft store a couple weeks ago for a whopping price of buy one get two free. Couldn't pass that one up! So I started by simply painting all three canvases with acrylic craft paint.
While I was waiting on the paint to dry, I used my die-cutting machine to cut out three pieces of patterned paper, then inked the edges of all of them with Distress Ink.
Once the paint on the canvases was fully dry, I simply adhered the patterned paper. Next I added a bit of bakers twine and some letters I've had in my stash for what seems like forever.
Next up, I took my Unique Laser Designs hearts and butterflies and gave them a good coat of Perfect Pearls.
Then I simply layered everything onto the canvases, along with a few flowers.
Then, to attach the canvases to each other, I added several cup hooks.
Lastly, I added a small piece of ribbon so the piece could be hung. What Mom wouldn't appreciate a beautiful handmade item on their special day?
Monday, April 28, 2014
Smile Necklace Holder
Welcome back! Are you read for a beautiful home decor project using Unique Laser Designs products? Well today I have a project using a simple canvas and turned it into a piece that anyone would be proud to display in their home. This could be used to hold bracelets and necklaces, or keys, or any other lightweight item you can think of. So let's get going and I'll show you how it was made.
The canvas I used was 8x8 in size and 3in deep. Simply paint the edges and partway onto the top of the canvas. I gave it two coats of paint.
Once the paint is completely dry, adhere your selected patterned paper.
Using a dry brush technique, add more paint around the edges of the patterned paper. Set aside to let the paint dry.
To add a bit of texture to the background, I adhered some white ribbon. Since the ribbon is really wide, I simply cut strips through the ribbon to have varying widths.
Now on to the embellishments. I chose three dress forms, two of which were inked with Distress Ink and the last was heat embossed.
On the two dress forms that were inked, I also added a thin layer of Glass Bead Gel Medium. Don't worry that it looks milky right now. Once the gel medium dries, all you will see is clear mini beads which add a wonderful texture.
The last thing to do now is just to screw in seven cup hooks across the bottom of the canvas.
The hardest thing for me now is to figure out if I wan to keep this all for myself or give it as a gift. What do you think?
Friday, April 18, 2014
Favorite Things Friday - Punches
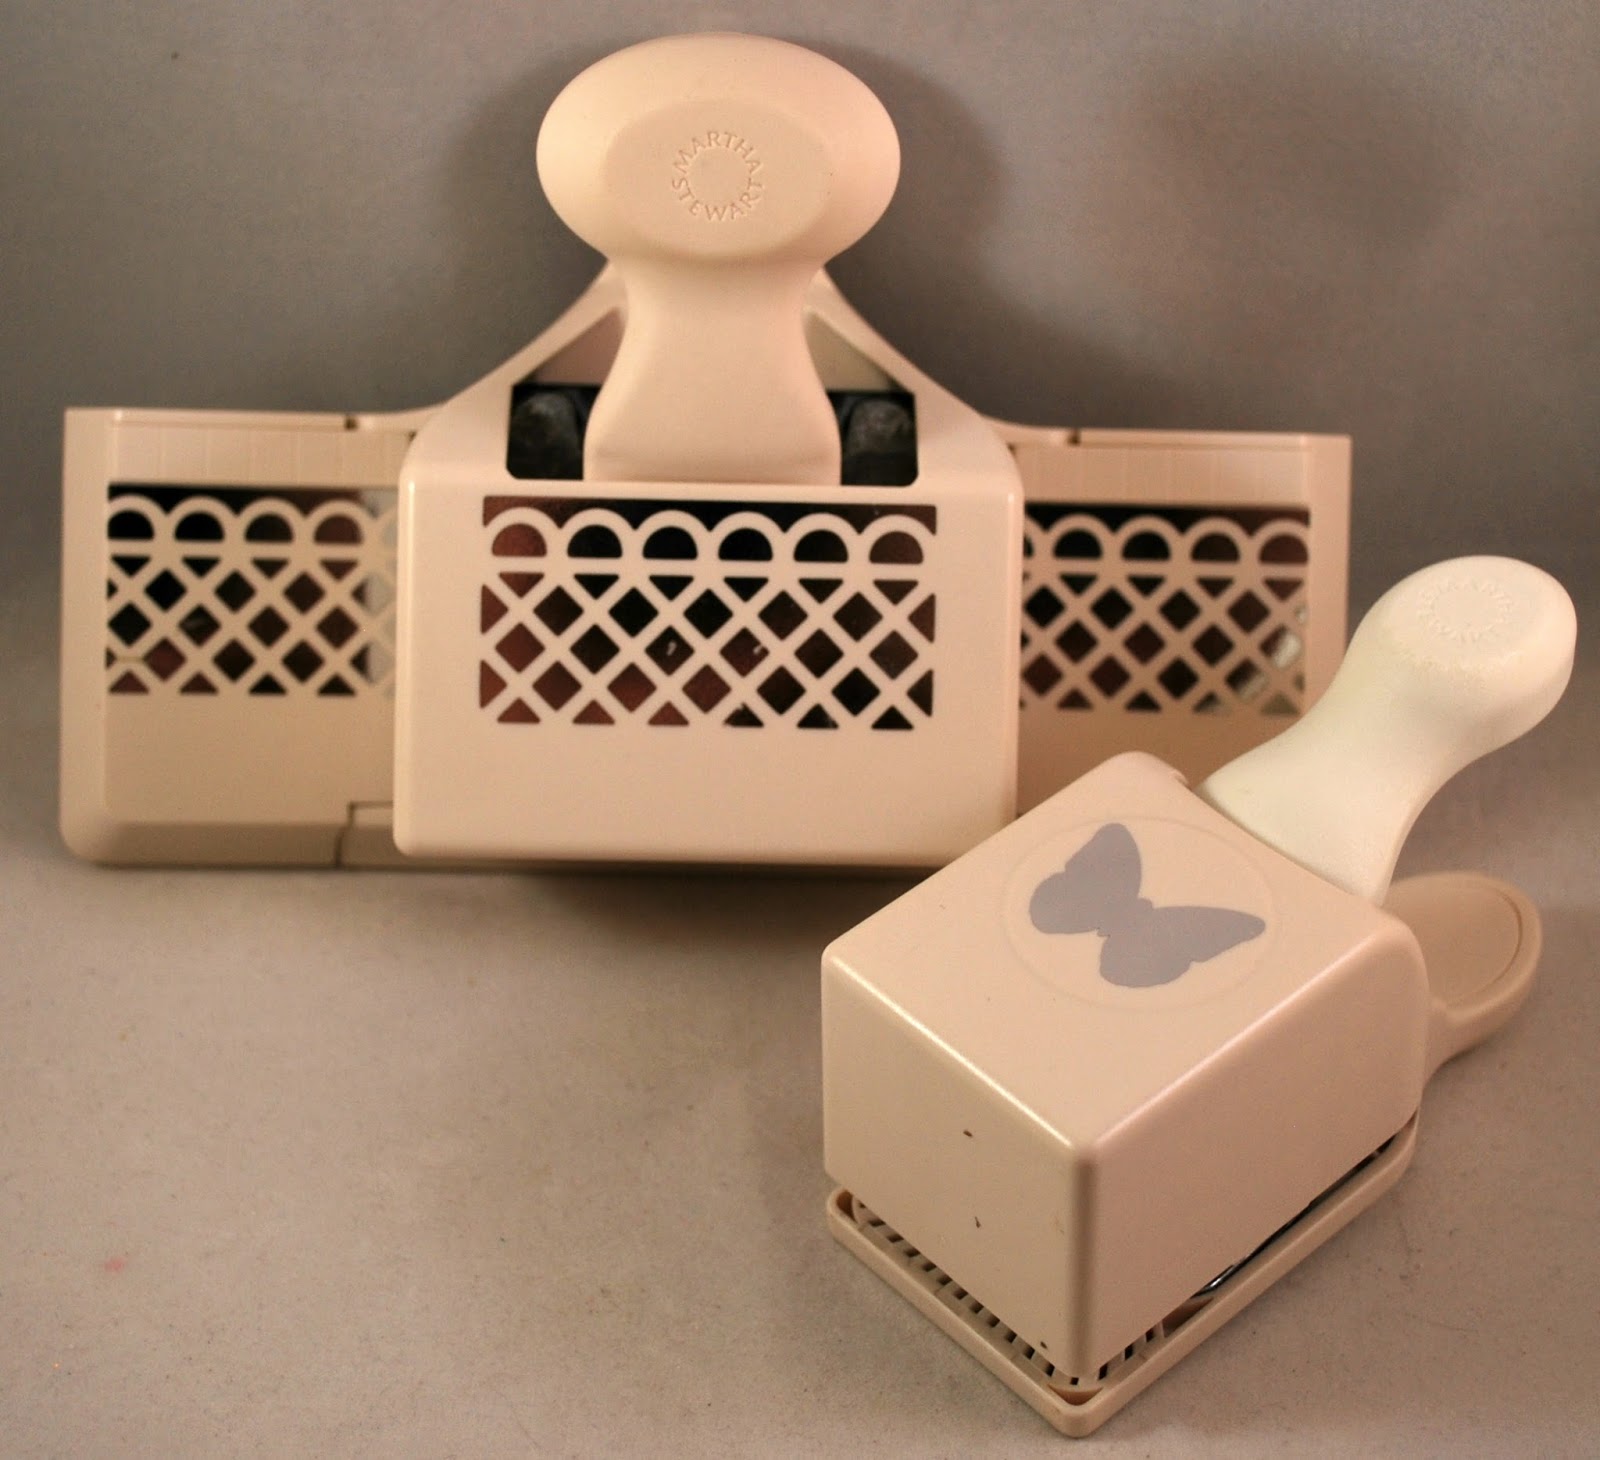
Ready for another round of Scrap It Girl's Favorite Things Friday? Well let's jump right on in! This week the theme is punches, another favorite item of mine. They make it so easy to quickly make a border or create multiple embellishments.
I chose two punches, one a border punch and one a shape punch. I use this specific border punch all the time, it makes a very lacy border. The butterfly is my all time favorite shape. I use this punch frequently to cut out multiples of the butterfly and layer them on cards and layouts.
So what's your favorite punch?
Wednesday, April 16, 2014
On The Hunt
Ready for another fun Easter project using Unique Laser Designs products? How about a cute tag with even cuter Easter eggs! So let's get moving on how it was made.
Starting with a Unique Laser Designs tag, I inked it heavily with Gelatos, gave it a spritz of water, then used my handy finger to blend the colors. Nothing better than getting your hands all inky lol.
Then I grabbed my spray ink and stencil and created some background circles.
Then I grabbed my jar of iridescent medium, a palette knife, and the same stencil and created another layer of circles.
Then, I created several layers of "grass". Lots of fun texture!
Now for the embellishments. I took my Easter eggs, inked them with Perfect Medium, then brushed on a layer of Perfect Pearls. Lots of shimmer and shine.
Lastly, I added the sentiment, layered the Easter eggs and a butterfly, and added some ribbon.
Subscribe to:
Posts (Atom)