Friday, July 8, 2011

Fun and Funky Altered Canvas

Happy birthday to me, happy birthday to me! And where am I on this wonderful day of mine? In the big city of Atlanta at the Scrapbook Expo working with a great bunch of gals in the Basically Bare booth. If you're in the area, we'd love to see you!

How often, at thirty-something, do you have a "first"? Well, I can say this is my very first canvas and I think I just might be addicted!

For those who have not yet wandered into the world of mixed media, don't let it scare you. Creating this canvas couldn't have been easier. I started with an 8x8 primed canvas and covered the entire surface with a generous coating of Liquitex Gel Medium. While the gel medium is till wet, take small pieces of tissue paper and just randomly apply it to the surface and crumple them as you go. By crumpling the tissue paper, it will create a wonderful texture to the canvas. Once the entire surface of the canvas is covered with tissue paper, apply a thin layer of gel medium over the canvas and set aside to dry overnight.

Once the canvas is dry, take several different colors of acrylic paint and randomly paint the canvas. And if you don't like how it turns out, let the paint dry and you can paint over it. Once the paint is dry, use a dry brush technique and apply a very thin layer of Liquitex Iridescent Medium. The iridescent medium will add just a hint of shine and shimmer to the canvas.


Now, on to the next layer of texture! I used the Basically Embellies Chipboard Hearts and painted them black. Once the paint was dry, I added a layer of Liquitex Glass Bead Medium. Set the hearts aside to dry overnight. And, I learned something about the durability of the chipboard too. Even with a layer of paint and thick mediums, it didn't warp or curl, a plus in my book!


For the last bit of texture, I used the Basically Embellies Felt Dress Forms and the Basically Embellies Canvas Wings. The wings were paints with Tattered Angels Glimmer Glaze and then attached to the back of the dress form. For the dress form, I wrapped the waist with a bit of fiber.


So go out, lose your inhibitions (your artistic inhibitions that is), and have fun. You never know where a bit of artistic freedom will lead.

Monday, July 4, 2011

Fun With Cards

It's time to share a couple of cards that were in the May edition of Scrapbook News and Review Magazine.

This first card was made by layering a Heidi Swapp transparency with Basic Grey paper. Add a bit of flower trim and ink and instant card!


The second card is just totally fun! This would be perfect for an anytime pick me up for a child.


I hope you've enjoyed these cards and stop back again soon!

Thursday, June 30, 2011

The Younger Generation

All of these layouts were in the May issue of Scrapbook News and Review Magazine and now I can finally share them with you.

I love the picture on this first layout. Such a mischievous look on Sheyla's face, hence the title! And this layout incorporates one of my new found loves - canvas. It takes sprays and mists like a dream, and doesn't warp like paper when it gets wet.

This second layout, featuring Emily and Felix, is such a fun layout. Those kids have so much energy, and I think the picture shows this. I wanted the layout to reflect some of that energy, and I'm hoping I achieved that effect.


And lastly, a picture of the twins playing together. And that energy I mentioned earlier, multiply it by two! These two muchkins have an endless supply of energy.

You've seen where my inspiration come from. So, where do you find inspiration for your projects?

Sunday, June 26, 2011

Where Does the Time Go?

I've recently started thinking about how quickly time passes. I was looking some old and some recent pictures of my niece (who just turned 13) and I couldn't believe how she had grown so quickly. So of course this became the inspiration behind my layout.


This layout was created as a collaborative between Basically Bare and Sketch Inspiration . The sketch was provided by Sketch Inspiration and I used Basically Embellie Banners and Basically Embellie Acrylic Birds for embellishments on the layout.

I had lots of fun with this layout too! Inking, masking, lots of bling and perfect pearls. Very much a girly girl layout, which is fitting of my niece. She's outgrowing a lot of her tomboy ways and is becoming very much the girly girl.

Thursday, June 23, 2011

A Pirate's Life

Both of these layouts were in the May issue of Scrapbook News and Review Magazine and now I can finally share them here.

ARRRRRRRRRRRRGGGGHHHHH! If we heard it once, we surely heard it a thousand times on our weekend excursion to Tybee Island Pirate Fest.


What a fun event, and I have tons of pictures to use as inspiration for future layouts.


The picture for this last layout was taken at The Crab Shack. In my opinion, one the best places to eat on the island. And, while you're waiting for a table, you can entertain yourself by feeding the alligators.

Monday, June 20, 2011

Then and Now

This layout is my DT entry for the second June challenge at Better Living Through Scrapbooking.


This challenge was all about showing how you and a close friend or relative have changed over the years. And boy, have we changed or what?!

So head on over, take a look at the other DT creations and get your entries posted for a chance to win the monthly giveaway. The prize for June is a $25 gift certificate to Basically Bare! They have such amazing alterable pieces - plain chipboard, corrugated chipboard, canvas, felt, acrylic. So what are you waiting for?

Saturday, June 18, 2011

Fun With Stamps

This tag was features in the April issue of Scrapbook News and Review Magazine and I can finally share it with you.

I had a ton of fun creating this tag! It's one of the few projects that quickly and easily came together without a lot of second guessing and reworking.


I started by applying a few colors of distress inks on the background and then stamping the flowers, butterflies, and dotted areas. While the ink was still wet, I applied a light coating of perfect pearls to give a shimmer. Next, the dress form was stamped. I stamped a second dress form onto canvas and cut out the skirt and attached it to the tag for a bit of added dimension. Lastly, the beaded trim and lace were added to the top of the tag.

This was a more time intensive project, but the results were absolutely worth the time!

Thursday, June 16, 2011

Canvas and Acrylic Embellishments

This card has two of my favorite mediums - acrylic and canvas! Both are easily alterable to fit any theme.


Using the Basically Embellies Canvas Hearts, I rolled the edges into white paint, then dipped it into white glitter while the paint was still wet. Then I used Staz-On to ink the Basically Embellies Acrylic Bird. To make the wing stand out, I took a scrap piece of patterned paper and used Glossy Accents to adhere it to the back of the wing. Since the Glossy Accents dries crystal clear, it's the perfect adhesive for acrylic. Lastly, a drop of Enamel Accents was added for the eye and the birdie is complete.

You might have noticed I didn't add a sentiment to this card. Why you ask? I like to keep a stash of cards on hand in case I need one at the last minute. By not adding a sentiment, it allows me to have a 99% finished card on hand. It only take a few seconds to quickly stamp a sentiment and I'm ready to place the card in an envelope and give it a home.

Monday, June 13, 2011

Fun Layouts of the Munchkins

Both of these layouts were featured in the April issue of Scrapbook News and Review Magazine and now I can finally share them with you.

What could be more precious than watching children sleep? They lose every bit of mischief and become completely adorable.


This second layout was inspired from a trip to Tybee Island, GA last year. We were all waiting anxiously for everyone to board the boat so we could start our site seeing tour.


Whether it's a vacation trip or just everyday occurrences, there is inspiration everywhere that can be used on your scrapbook projects.

Saturday, June 11, 2011

Tag Tutoral

Scrapbook News and Review Magazine recently had an event showcasing tags, arches, and ATC's made by the staffers. Now I can finally share my creation with you.


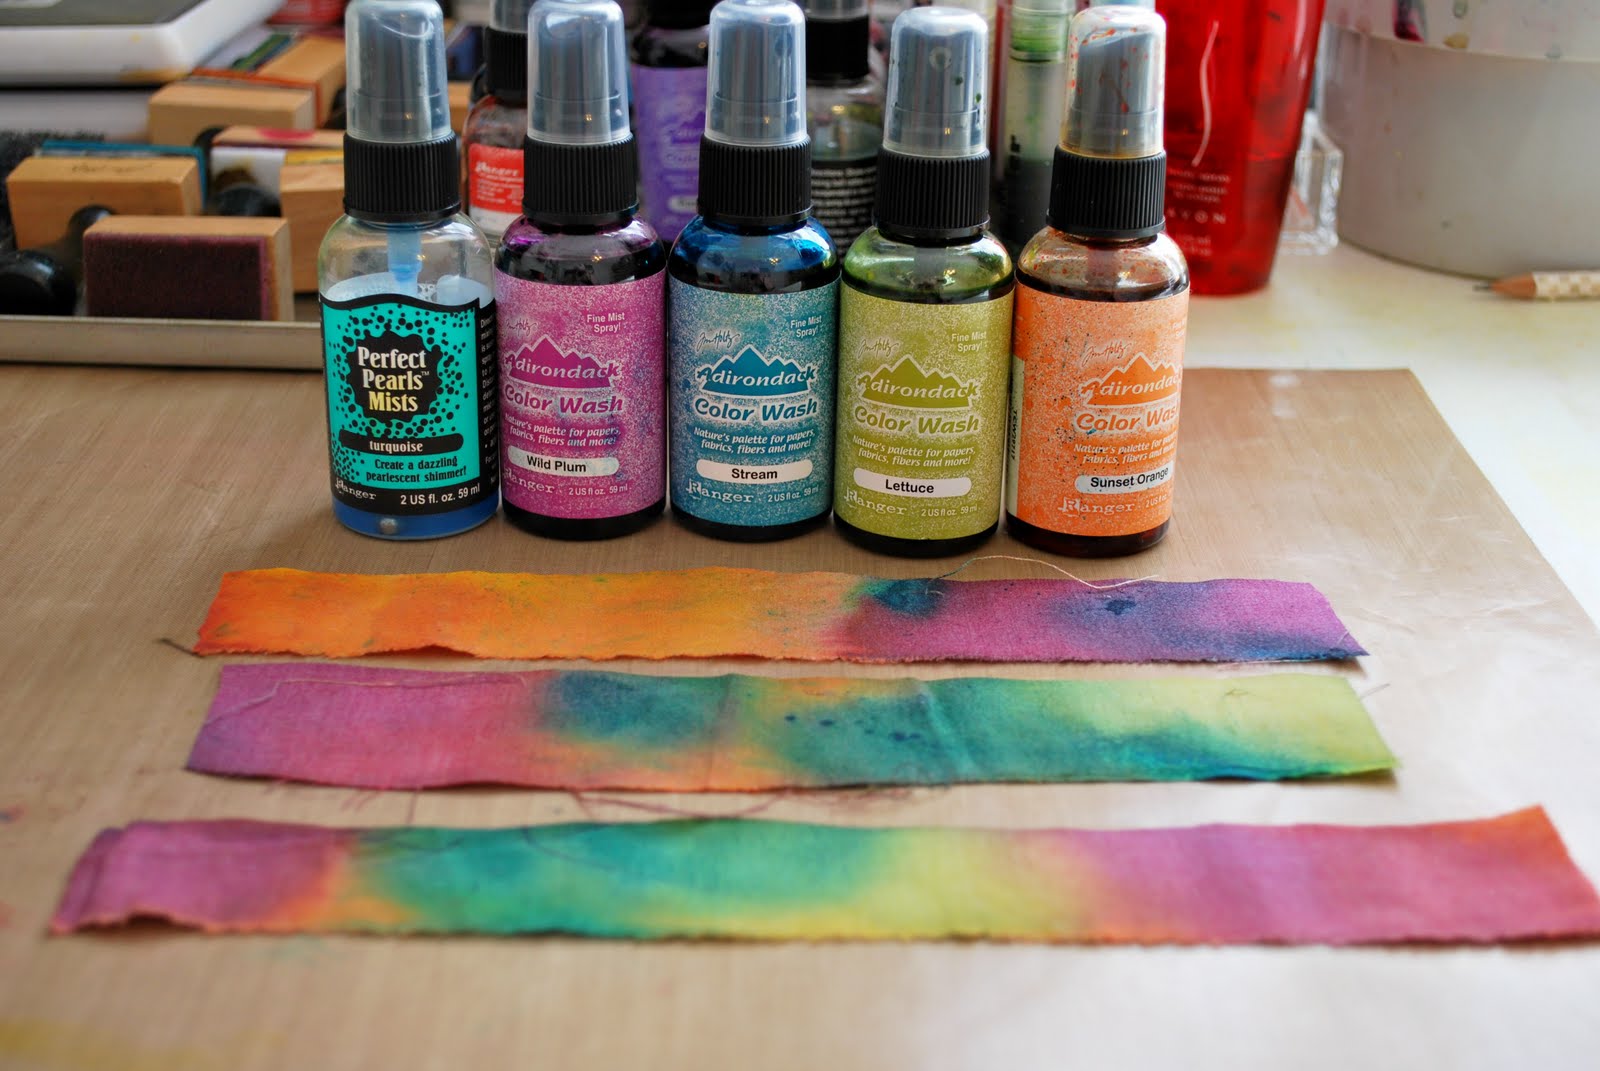
I had a blast working in this tag. Instead of using paper as my background, I experimented and used fabric. And what a fun medium to play with too! I will warn you, this tag is technique heavy, but don't let that discourage you at all. For me, that's one of the best things about making projects is the discovery of new techniques to add to my arsenal.


Step One: Take three strips of white fabric and cut to 2 1/2 in by 6 1/2 in each. Randomly spritz with color until thoroughly saturated. Set aside to dry.


Step Two: Once fabric strips are dry, use a brush to coat the cardstock with gel medium.


Step Three: Apply fabric strips to cardstock base, slightly overlapping each strip. Set aside to dry.


Step Four: Once the gel medium is dry, trim cardstock to 6 1/4 in by 3 1/2 in and also round the corners.


Step Five: Using a Crafter's Workshop template and white ink, add circle designs on top of the fabric.


Step Six: To start the beaded fringe, bring up a beading needle from the back to the front of the cardstock and start adding beads. Continue adding beads to the thread until you have about a 12 inch length of beads.


Step Seven: To start forming the loops, bring up a second thread from the back of the cardstock.


Step Eight: Section off approximately 35 beads so you can see where the loop will be placed. Run the second needle under the thread of beads and then take the needle back down the same hole as it was brought up.


Step Nine: Continue forming loops across the width of the cardstock. Once the beaded fringe is complete add a length of floral ribbon across the top to hide the stitch marks.


Step Ten: Using a grip patterned background stamp and white ink, stamp the top right corner of the tag.


Step Eleven: Using a waterproof ink and watercolor paper, stamp wings and cut out.


Step Twelve: Add a drop of color wash onto a craft sheet and add a few drops of water to dilute the color. Brush the color onto the wings.


Step Thirteen: Apply alcohol ink to the back of the clock face.


Step Fourteen: Attach keyhole and wings to clock face.


Step Fifteen: Attach embellishment to tag. Print out quote and also attach to tag.

Thursday, June 9, 2011

A Whale of a Card

It's time for a bit of fun with a children's birthday card!


When is a paisley not a paisley? When it's transformed into a whale of course! :) I used the Basically Embellies Paisleys to create a super cute whale.


Using the corrugated chipboard from the set, I inked the entire piece with a light blue ink. Once the ink had dried, I used a brown Zig marker and added dots around the edge and then drew a mouth. Lastly, I adhered a googly eyeball to finish the face.

For the water spout, I coated the entire piece with adhesive and then dipped in it glitter.

The "waves" were created by using a 2in circle punch and overlapping the punched circles.

Until next time, keep thinking outside the box. You never know what "creatures" your embellishments might become.

Monday, June 6, 2011

Time To Get Inky

This is my DT entry for the first June challenge at BetterScrap.com. Head on over and play along for a chance to win the monthly prize!


The challenge was to create a layout showing what I do when things don't go my way or I have a bad day. The first thing that immediately came to mind was to get inky. There's just something completely relaxing for me when I get lost in a world of creativity. I crank the music up so I can drown out the world around me and go to town. An yes, after a good play date in my scraproom, my hands look just like this. :)

So, what do you do when it feels like the world is conspiring against you?

Thursday, June 2, 2011

Dress Form Card

This is my first project as part of the Basically Bare Design Team! Just bare with me as I get all my excitement out! For this project, I just couldn't resist the call of the Basically Embellies Chipboard Dress Form.


The chipboard takes color and dry embosses like a dream. I inked the entire surface with Liquitex acrylic ink and once the ink was dry I ran it through my Cuttlebug using the Swiss Dots embossing folder. For contrast, I used a white ink pad and lightly inked over the raised areas. The bottom of the dress form was then inked with gold alcohol ink. To finish off the dress form, a crown charm was added to a piece of ribbon which is tied around the waist.


This card would be perfect for a loved one or special occasion. Basically Bare {Basically Embellies} are so versatile that they can be used bare, dressed up, dressed down, inked, embossed, etc. Just let your imagination have free reign and there's no end to what can be created.

Tuesday, May 31, 2011

ATC's Galore!

All of these ATC's were featured in the April issue of Scrapbook News and Review Magazine. And if you haven't tried one yet, what are you waiting for? They are a fun way to be creative but also have the instant gratification of a quick project.

The first ATC was very simple to create. The background was inked with several colors of distress inks, ran through a Cuttlebug, then inked again with a darker color of distress ink. The second inking brings out the emobssed areas. Then the foreground area was stamped and inked, the edges were torn, and then a few beads were added to the corners.


The second ATC was stamped, then the background inked with several colors of distress inks, then the entire surface was coated with crackle paint.


This last ATC was created in a very similar manner. The background was again inked with several distress ink colors and then the images were stamped.


All three of these were created using very similar techniques, but the end product on each one is stunning and unique.

Thanks for stopping by and I hope I've inspired a but of creativity for you today.

Thursday, May 26, 2011

The second May challenge is up at Better Living Through Scrapbooking. Head on over, create a layout (or two or three), and get entered for the May challenge prize, a gift certificate to Gauche Alchemy.


This was my DT contribution. I had the freedom to choose my own theme this time, so I let my photos be my inspiration. I just went looking through all of my pictures until I found one that screamed out to the scrapped.

Tuesday, May 24, 2011

Crayon Resist Stamping Tutorial

Crayon Resist Stamping is a fun technique that allows you to quickly and easily create highlights in stamped images. And with multiple variations on the technique, it's one you won't easily become bored with.


Start by gathering all necessary supplies.


Step One: I wanted to create a background so I chose two similar flower stamps, one just slightly smaller than the other and randomly stamped both flowers onto the cardstock. Allow the ink to fully dry on the cardstock before moving on to the next step.


Step Two: Using a wax crayon, trace areas around the flowers where you want to highlight, keeping in mind that any areas that have been highlighted with the wax crayon will resist any future applications of ink. As the crayon I was using was clear, it's really hard to see in the picture but it does show fairly well in the bottom flower with the light reflecting off the wax.


Step Three: Add desired ink colors to complete the background. Tip: The darker the ink colors used, the more the resist areas will stand out in contrast.


Step Four: To complete the card, I added a bit of glitter glue in a few places for a bit of sparkle and then added the sentiment and butterfly.

Variation One - Crayon resist on colored cardstock


This variation is done using the first three steps above, with the only change being using a colored cardstock instead of white cardstock. This option gives a nice tone on tone color.

Variation Two - Multiple layers of color


For this variation, use steps one through three above; however, with step three use a light colored ink. Once the ink has dried, repeat step two and add highlight areas with the wax crayon in different spots than the first time. Then repeat step three, this time using a darker color ink. Once you have completed the second inking, you will have areas of white showing from the first resist, then areas of the lighter ink showing from the second resist.

Tuesday, May 17, 2011

Thank You Card

Here's a card that was in a previous issue of Scrapbook News and Review Magazine. I love to make shaped cards. Something a bit different from the standard card shape. And of course, what card would be complete without a bit of bling?


I hope you've enjoyed your visit today and will be inspired to make your own fun creations!
Related Posts with Thumbnails